Correct the perspective of photos you have taken

One of the things that professional photographers always take care of is that they get the perspective right. I on the other hand am more the snapshot kind of photographer who does not really spend much time making sure things like the perspective are in order before I tap on the take a photo button of the camera.
This sometimes has the result that the perspective of an object that I did take an photo of is not ideal, that the object looks out of alignment because it is titled to one side.
If you want to correct the perspective of photos, you can use image editing software to do so or, if you lack the skills or time to use it a program like Perspective Image Correction.
Here is how it works. You need to download and install the program on your Windows PC first. The first thing you do when you start it up is to select File > Load source image to load the photo that you want to correct the perspective of in the program interface.
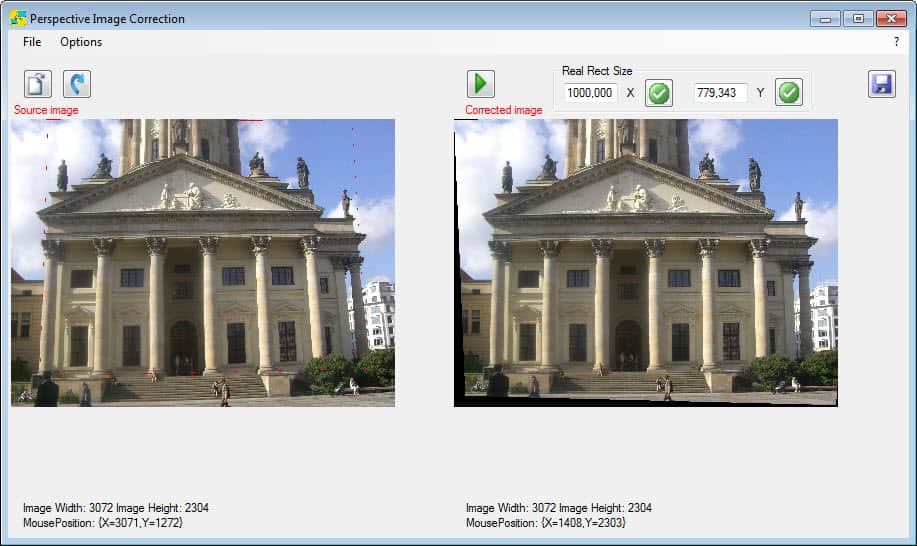
You then draw a rectangle around the area of the photo that should be aligned with each other. You do so by clicking on the photo four times, for instance the four corners of a building or object, so that the program knows which area of the photo should be on the same level.
Once you did so you will notice that the corrected photo is generated automatically on the right. If you did not get it right the first time, you can right-click on the photo on the left at anytime to start the process from the beginning.
The program supports zooming in and out with the mouse wheel when the cursor hovers over the source or processed image. This can help you pick the correct location for the rectangle.
You do not have to pick the largest possible area for the rectangle either as all information on the photo will be retained automatically. Only the photo itself will be tilted around to align it properly.
When you are satisfied with the result, you can click on the save button to save the corrected image to your local system.
Advertisement