Working with bezier curves and nodes in Inkscape

If you do any graphics you know that, at some point, your work is going to have to turn to much higher quality tools. Although I find The GIMP great for day to day raster work, when you need higher quality, line art and vector graphics, you have to turn to a took like Inkscape. Inkscape is an open source vector graphics editor  available for Linux, Mac, and Windows. Inkscape is similar in scope and purpose to Illustrator, Corel Draw, and Xara X. But unlike The GIMP (and other raster editors), Inkscape isn't quite as simple to use. You won't open Inkscape and quickly whip out a button or logo for a web site. What you will create are very detailed, high resolution, works that are scalable and print-worthy.
Because of the complication of Inkscape, I though it would make sense to illustrate some of the techniques with this tool in a series. In this first entry I will show you how to work with one of Inkscape's most fundamental tools - bezier curves. It is with this tool that you create most of your work.
What is a bezier curve anyway?
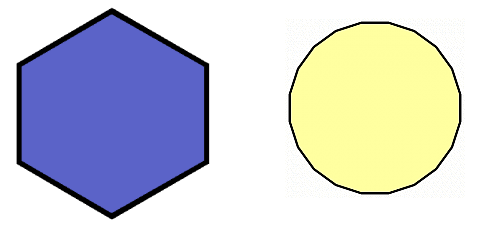
A bezier curve is a smooth curve, made up of paths, with controllable nodes (or handles) that allow you to manipulate the curve in numerous ways. A curve can have any number of paths and the more paths the smoother the curve. A very simple way to think about this is examining two different geometric figures. Take a look at Figure 1. Here you see two different geometric shapes. On the left you have a hexagon (six sides) and on the right you have an icosagon (20 sides). Obviously the image on the right looks more like a circle. Why? More "paths". That is what we are dealing with here.
If you can imagine the figures at the right starting as squares and then, using the right tool, adding new nodes into the path sections (a square would have four "paths" by default. The more nodes you place on a path, the more you can manipulate that path. Enough nodes and a square can be manipulated into a circle.
Now, let's see how this is used in Inkscape.
Create a shape with the tool
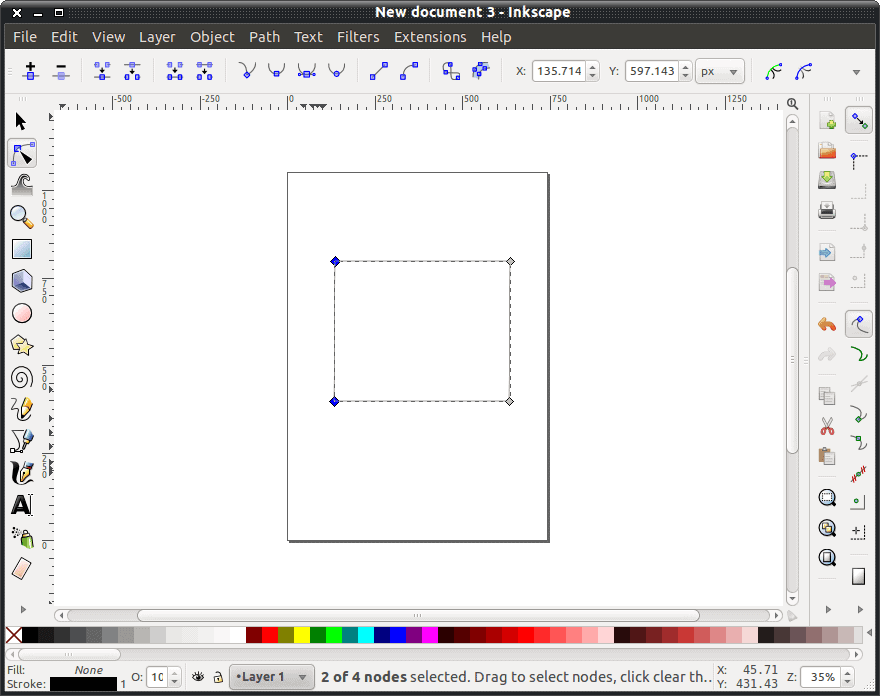
Open up Inkscape and then select the Bezier Curve tool (on the left side). With that tool you are going to create a shape. You don't just click the mouse and start drawing though. You create paths. If you want to create a square with this tool you must hold down the shift key, click a point on the blank canvas and then click the remaining points of the square. You must hold down the shift key the whole time you are creating and then make sure you close off the square by clicking on the original point with the final point (see Figure 2).
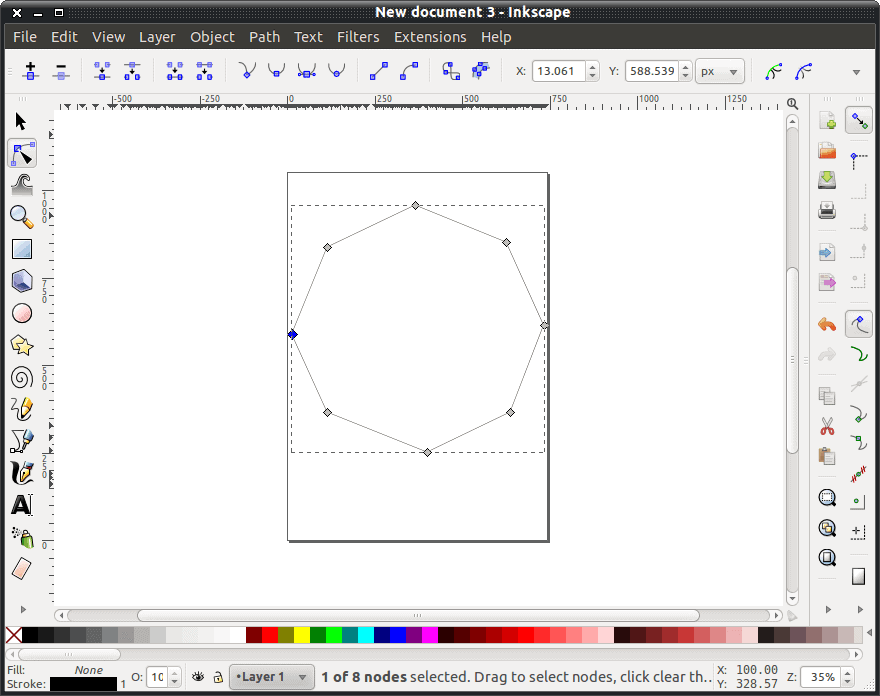
Now to add nodes to the paths (of which you have four). Click on the Edit Path by Nodes tool (second from the top on the left). Now click on the Insert New Nodes button (far left on the top row of icons). Double-click in the center of the top path. This will create a new node in the path. Do this for both the sides and the bottom paths. Once you have done that you will have a square with eight total nodes. If you click and drag each of the center nodes outward you will have an octagon (see figure 3). You can then add more nodes and continue smoothing out that shape until you eventually have a circle.
And that is one way to work with bezier curves and nodes.
Advertisement


If you don`t mind, why don`t you make different tutorials so that we can learn such nice software usage…Thanks for such a nice article.