Install a BSD-variant with the help of PC-BSD
You've managed to tackle Linux. You've installed it and are using it (or planning on using it) for either a server or a desktop. You've found it works well, but maybe you want to take it up a notch and give a BSD a try. BSD is not Linux. BSD is a modification of AT&T's UNIX and was created at the University of California at Berkley (Hence BSD - Berkley Software Distribution).
Technically speaking Linux is just a kernel. Linux distributions put everything together in one package for the user. The BSDs are all complete operating systems (kernel, drivers, tools, etc) and are released under the BSD license (where the Linux operating system is released under the GPL). Under the hood there are plenty of differences. From package installation to system administration, most things are handled differently.
But there is one big difference that tends to stop new users from even giving any of the BSDs a try: Installation. If you've ever tried to install a BSD then you know how much more complex these installations are. But not all BSDs are created equal. One flavor of BSD - PC-BSD (based on FreeBSD) has finally taken the installation to a level on par (and in some ways even better) than the Linux installation. In this tutorial you are going to see a walk-through of the PC-BSD installation.
Getting the image
The first thing you need to do is to download the ISO image. You can find all available image files on the PC-BSD download page. Make sure you choose the right download for your system. Once this is downloaded you will have to burn the image onto a CD (or DVD). Do that and then place the media into the drive of your target machine. Let the fun begin.
Step 1
The first step is the EULA that you must "read" and then agree to. Once you have done that click the Next button to begin the real work.
Step 2

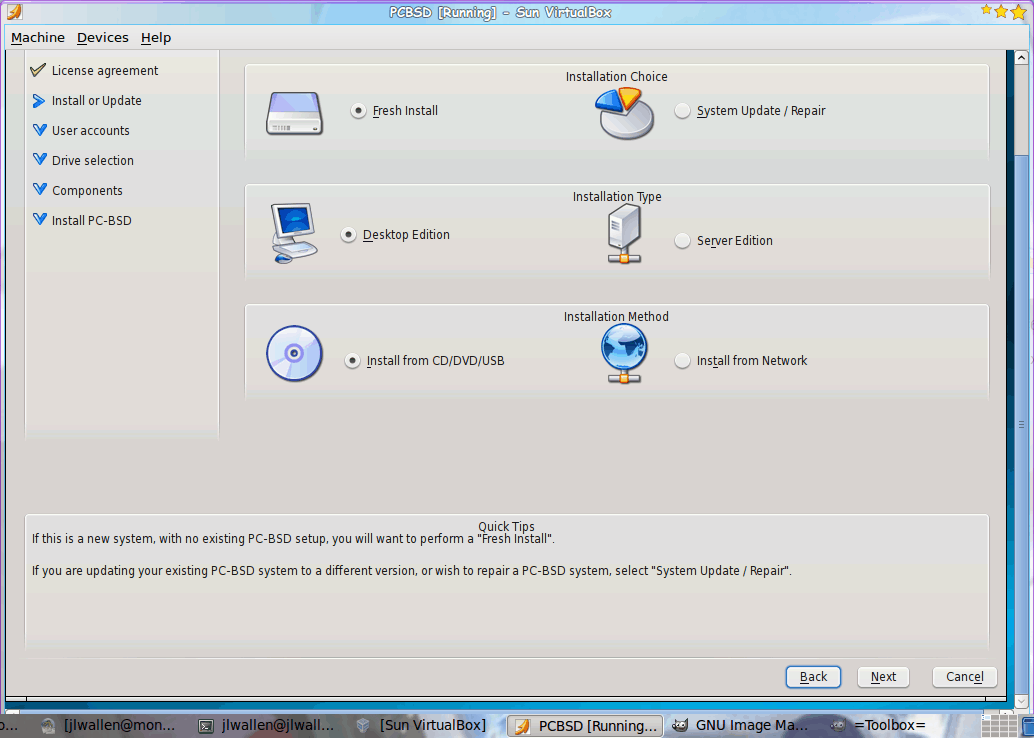
This is where you begin the installation. This first screen (see Figure 1) is about installation type/choice/method. Most likely this is a fresh installation, so the default will work. You can also choose between a desktop or a server installation as well as installing from either CD/DVD/USB or a network install. You can also use this to repair a system with this same disk. To do this select System Update/Repair.
Step 3
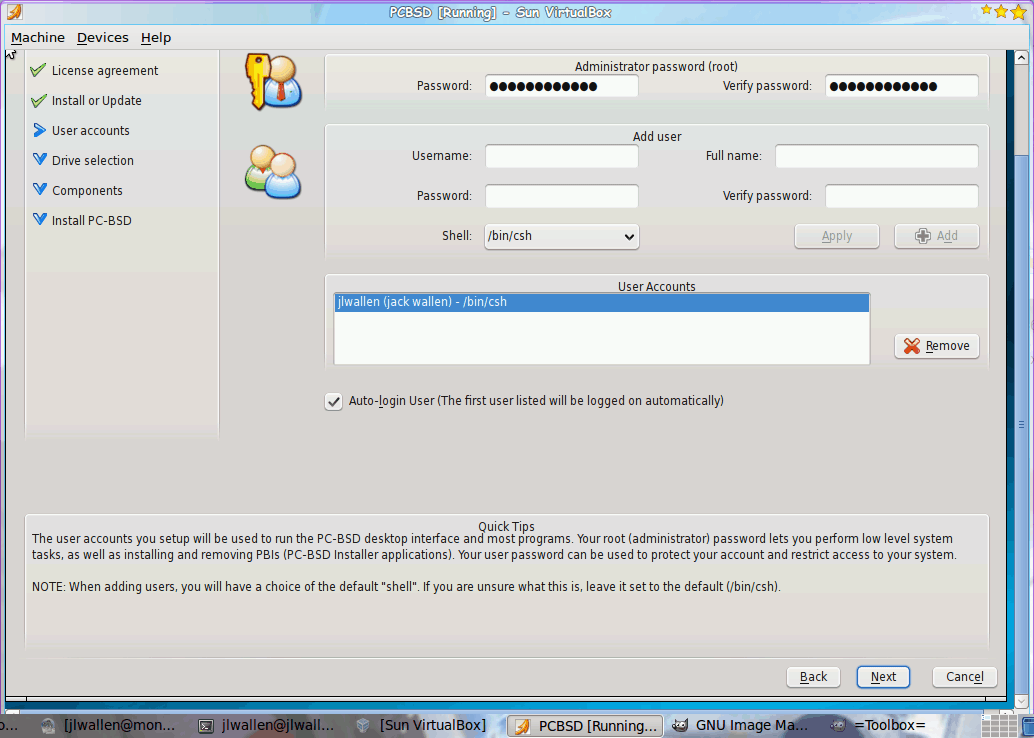
The next step is fairly straight-forward. Here (see Figure 2) you are going to assign a password for the root user and create a new user. Make sure, after you enter the details for the new user, you click the Add button or the new user will not be added to the system. You can also add as many users as you need for this system here.
Once you are happy with your root password and new user(s), click the Next button to continue on.
Step 4
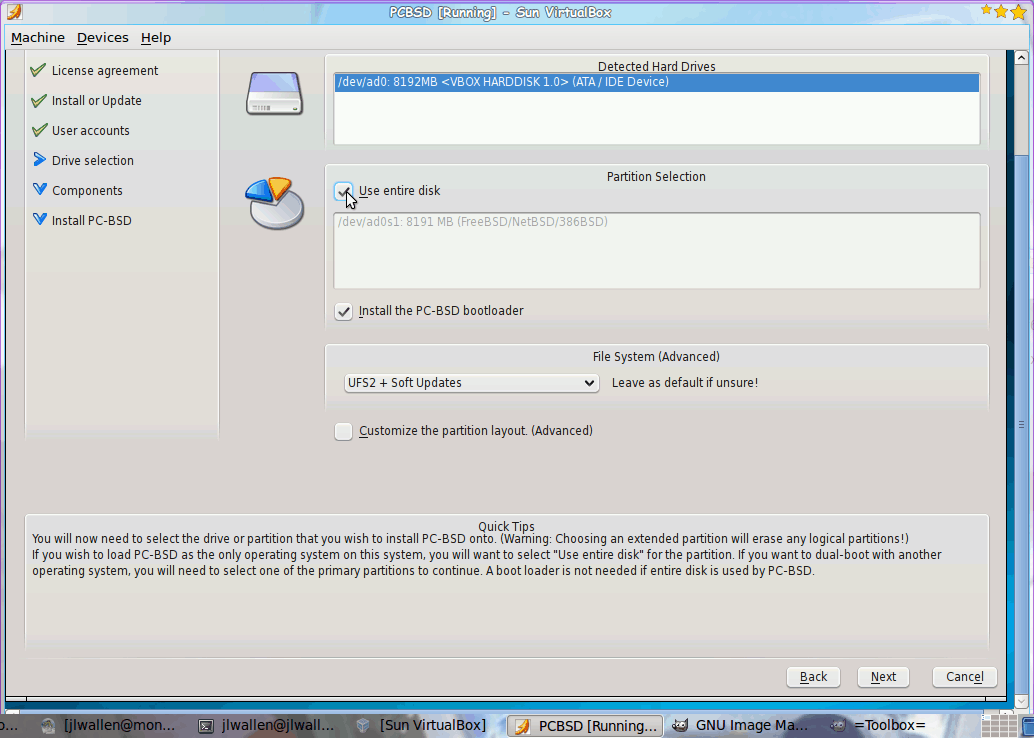
This next screen (shown in Figure 3) asks you to select the drive for the PC-BSD installation as well as the partition layout. Most likely, especially if you are a new user, you will want to leave the defaults in place. But you will have to select your target hard drive from the list of drives and then the partition layout. As you can see in my example (I am installing this inside of Virtualbox) I am using the entire available drive.
Click Next when you have completed this step.
Step 5
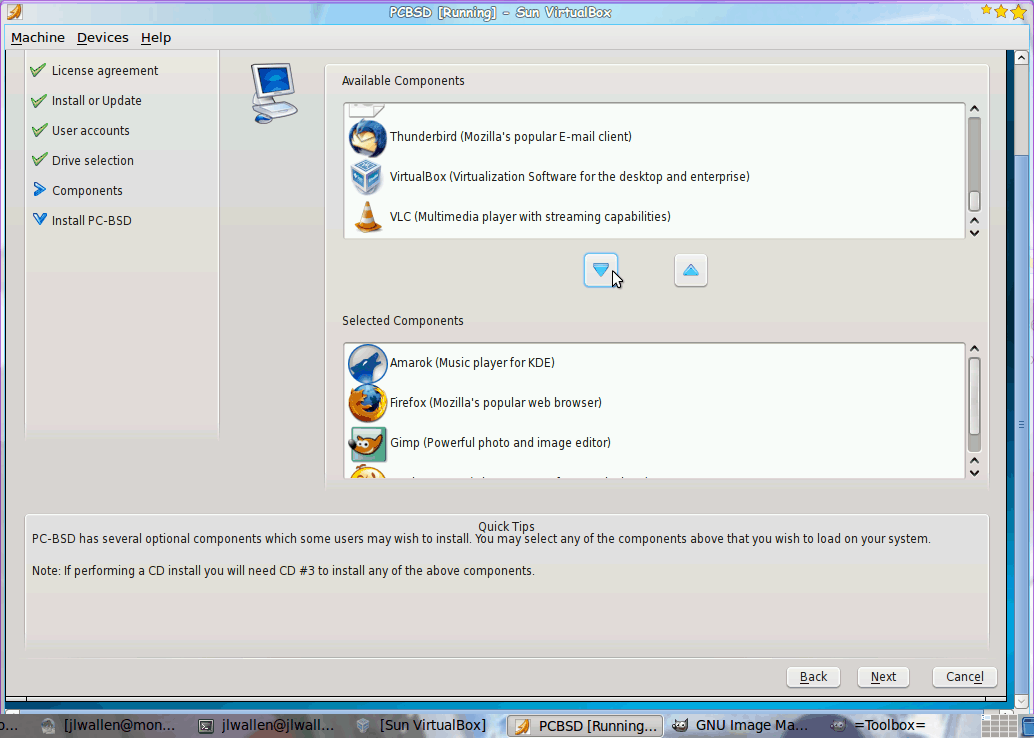
You are now ready to select the available components to be installed on your PC-BSD operating system. The window is broken into two horizontal panes (see Figure 4). The top pane is the listing of all packages and the bottom pane is a listing of the packages that will be installed. To add to the bottom pane, select a package from the upper pane and click the downward-pointing arrow. To remove a package select that package from the bottom pane and click the upward-pointing arrow.
When you are satisfied with your package selection click the Next button to continue.
Installation progress
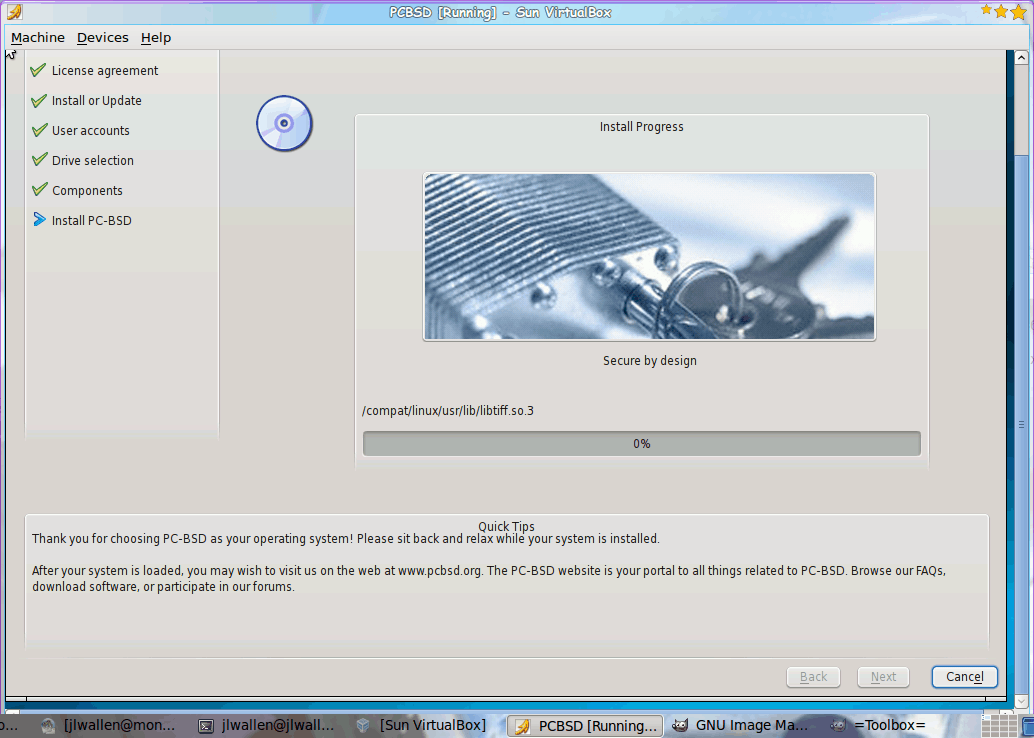
The next window (see Figure 5) shows the installation progress. There is nothing for you to do here except wait. Depending upon how many packages you have selected, and the speed of your machine, the installation can take anwhere from 15 minutes to 30 minutes. And when the installation is complete, you will have yourself a rock-solid BSD machine.
Final thoughts
I'm very glad to see that someone has created a BSD variant that is easy enough for the masses to install. PC-BSD allows anyone to give one of the most solid, reliable, and secure operating system available a try.


Are you telling virtual box that it’s a “freebsd” OS?
Yes I am setting it to FreeBSD, I’ve tried both 32bit and 64bit versions of PC-BSD install disks with the same results.
I tried it on VMWare Fusion, which installed okay but failed to get past the video card detection on boot up.
Been trying to install this but the VirtualBox 3.1 VM reboots itself about 10% way through the install process.
Any ideas?
PC-BSD isn’t really new, at all :-), but hey, publicity is publicity…
The installer is nice and the base the system more user-friendly out of the box, especially for desktop use (I haven’t used it on the desktop in a while but one thing i recall about freebsd is that the sound drivers are never compiled into the kernel out of the box, you have to load a module or re-compile your kernel to simply play an mp3, but then it’s more server than desktop oriented so i don’t hold it against the team).
There’s another similar variant called “desktop bsd”, also well worth a look.
Final thought…. Did you know that Apple’s OSX o/s is based on FreeBSD! Well if you didn’t, you do now!