How To Back Up WinSCP Sessions

The following guide explains how to back up WinSCP sessions easily using native functionality the software client ships with.
WinSCP is a very flexible SFTP and SCP client for the Windows operating system. One of its features is the option to save server IP addresses or hostnames, usernames and passwords so that they do not have to be entered before connecting to the server in question.
Server administrators who are using stored sessions may use the program's backup functionality as a fallback or for transfers to other devices they work on. WinSCP ships with options to back up all session information, and to import the information on the same machine or another machine the program is running on.
How To Back Up WinSCP Sessions
WinSCP comes with the tools to backup the session data. The setting is hidden in the preferences of the scp client.
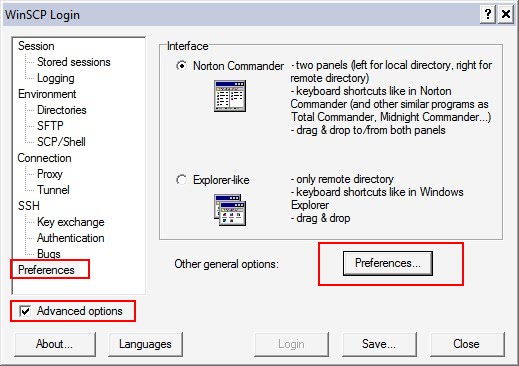
Server administrators need to check the advanced options box in the lower left corner of the application first. Doing so reveals additional options in WinSCP, among them the backup functionality.
Advanced preferences are listed in the program options after they are enabled.

The options are displayed on the left side of the WinSCP start screen. Select the preferences link there to get started. There you need to click on the preferences button that is displayed to open yet another window with -- you guessed it -- preferences.
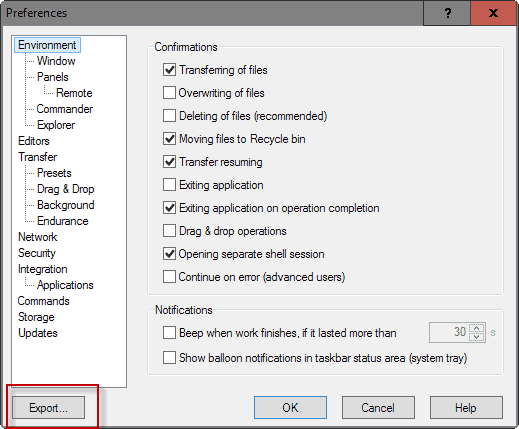
This window holds a lot of new options that let you customize many different features of WinSCP. You find the export button listed in the lower right corner of the new window.

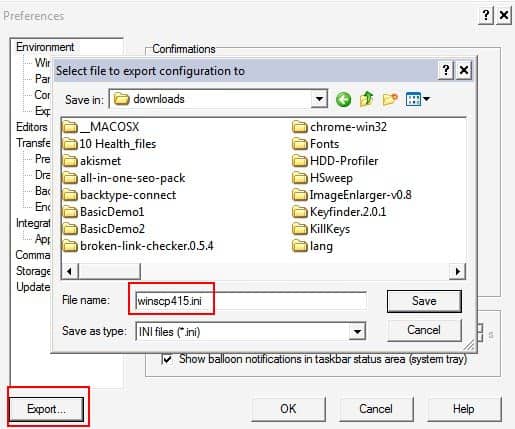
A click on the button launches a file and folder browser window. You use it to select a destination for the backup file that is saved to the local system when you use that option.
The process saves an .ini file to the local system.
This .ini file contains the session information. You may move it to another computer to import it there, or store it in a safe place to have it as a backup when the need arises.
Restore WinSCP Sessions
Now, the easiest way to restore the session information is to replace the existing winscp.ini file with the one you backed up earlier. You need to make sure that WinSCP is closed during the operation, and may need to rename the backup file to winscp.ini for this to work.
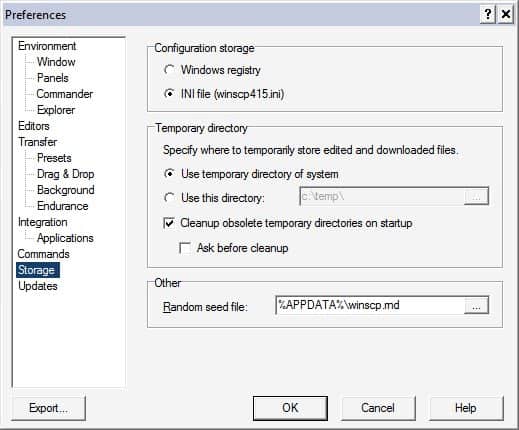
You may also need to edit the storage settings of WinSCP if the ini file is not recognized once you replaced it.
WinSCP supports storing data in the Windows Registry or in ini files. If the former is the default the ini file will not be loaded. The storage location can be edited in the storage options under Preferences (the same preferences window that you open when you back up session information).

WinSCP should then use the ini file and display all stored sessions properly in its interface.


Short, Simple but very useful article. Thank You!!!
Perfect! Thanks
miam instalat winscp si nu pot sa imi fac siteul de oarece nu am cont pt. acest program.
va rog cine ma poate ajuta sa imi fac cont sa ma caute pe yahoo mesenger
pe id-ul piciu_stefan si sami dea detali despre cum sami fac contul.
miam instalat winscp si nu pot sa imi fac siteul de oarece nu am cont pt. acest program.
va rog cine ma poate ajuta sa imi fac cont sa ma caute pe yahoo mesenger
si sami dea detali despre cum sami fac contul
If the above doesn’t work, try this…
Open the Registry Editor, Search for “WinSCP”. For me, it’s under
HKEY_CURRENT_USER\Software\Martin Prikryl\WinSCP 2\
Right click on “Sessions”, Export this to a .reg file
On your other machine, Open Registry Editor –> File –> Import to import the .reg file that you created above