Installing a Windows XP as a virtual machine on VirtualBox

In my last article (Installing and configuring VirtualBox for virtual OSes)Â I walked you through the installation of the VirtualBox virtual machine tool. In this article I am going to show you how to actually install an operating system with this tool. You will be surprised at not only how simple the installation is, but how much better hardware detection is. In fact, as you will witness in the sample installation we will do, no hardware drivers are necessary. Believe it or not, Windows XP will work right out of the box.
Now I am using the open source version of VirtualBox so no USB support is included. Outside of that - everything should work exactly as expected.
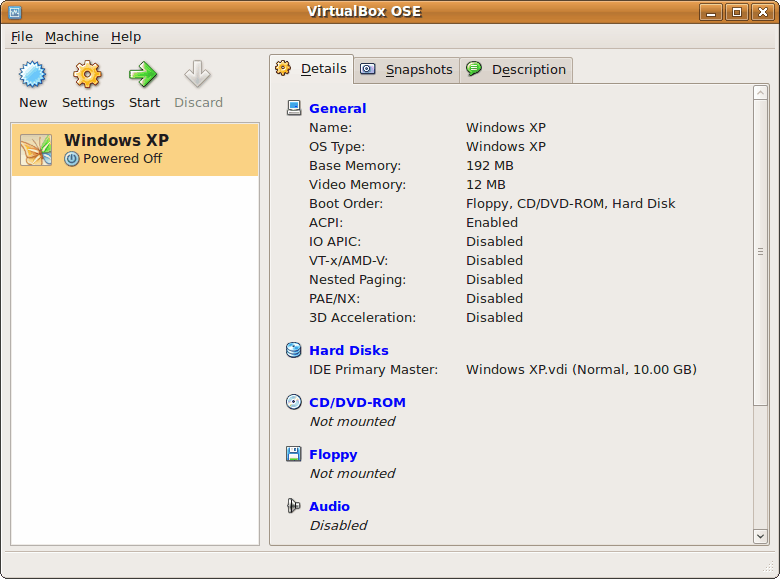
Before you actually read this article make sure you have read through the first article and have VirtualBox installed.Once installed you can fire up VirtualBox and you will see a window similar to that in Figure 1. The only difference being that in my example there is already a virtual machine installed. And even though the currently installed VM is Windows XP, we can still install another XP instance. You can have as many instances of a single OS as you want so long as you have the room for it.
With that said, let's begin the process.
The first thing to do is to click the New button which will start up the Wizard. This wizard, just like the setup wizard shown in the original article, is very user-friendly and makes for installing a virtual machine a breeze.
The first screen is just a welcome screen - click the Next button to move on to the first real interactive screen.
OS Name/Type
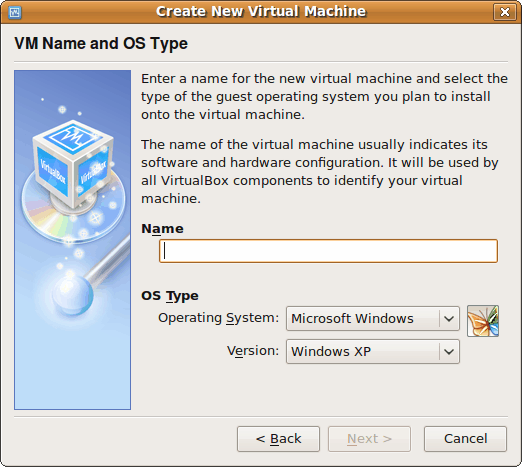
The first screen (shown in Figure 2) will require you to give the VM a name and select the operating system. Since I already have a VM called Windows XP I will name this new version something different.
After you have configured the name and the OS type click the Next button to move on.
Virtual Memory
The next screen requires you to select the amount of memory you want to dedicate to your Virtual Machine. Use caution with this setting. You have to still have enough memory left for your host operating system to run. By default VirtualBox will offer you the minimum required to run the virtual machine. This is fine if you don't plan on doing much with the VM. If, however, you plan on running particular applications that are memory intensive, you should bump up the virtual memory a bit.
Hard Drive
This next screen was explained in detail in the original article - refer back to that for details. Once you have finished that section, you are ready to finalize your virtual machine and begin installation. Click Finish and you're ready.
Powering it on
Now put your OS cd into the CD drive, select the virtual machine you want to use, and click the Start button. The first thing you will see is an information box instructing you how to capture and rekease your cursor. This is important to know, otherwise you will find yourself not being able to use your mouse outside of VirtualBox. To capture the cursor in VirtualBox you just click the mouse inside of the machine window. To release the cursor you hit the Ctrl key on the right side of your keyboard. That's it. Click through that warning and you're ready to rock.
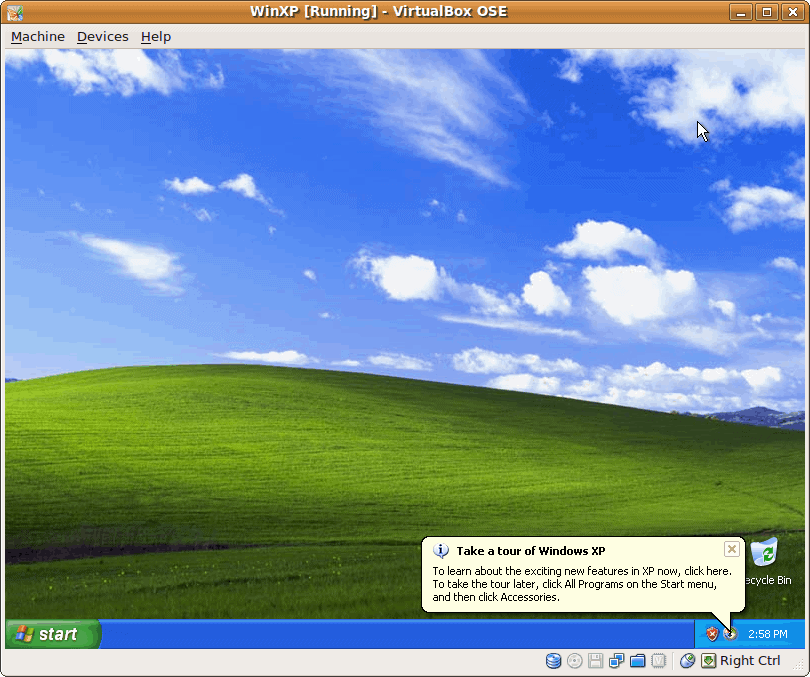
What happens now is pretty much a standard installation of Windows. This will generally take about the same amount of time a normal installation will take. When you are finished you will have a working install of Windows XP (as shown in Figure 3).
You will notice XP is inside of a window. Within that window is a menu with three choices. One of those menus you will use quite often is the Machine menu. Of course you can not get to it if the virtual machine has captured your cursor. If you are working within your VM, and you want to get to that menu, click the right Ctrl key and your cursor is released.
From the Machine menu you can do a number of things such as:
- Change the view mode to full screen.
- Take a snapshot of the current state of your virtual machine.
- Pause your virtual machine.
- Shutdown your virtual machine.
- Close your virtual machine.
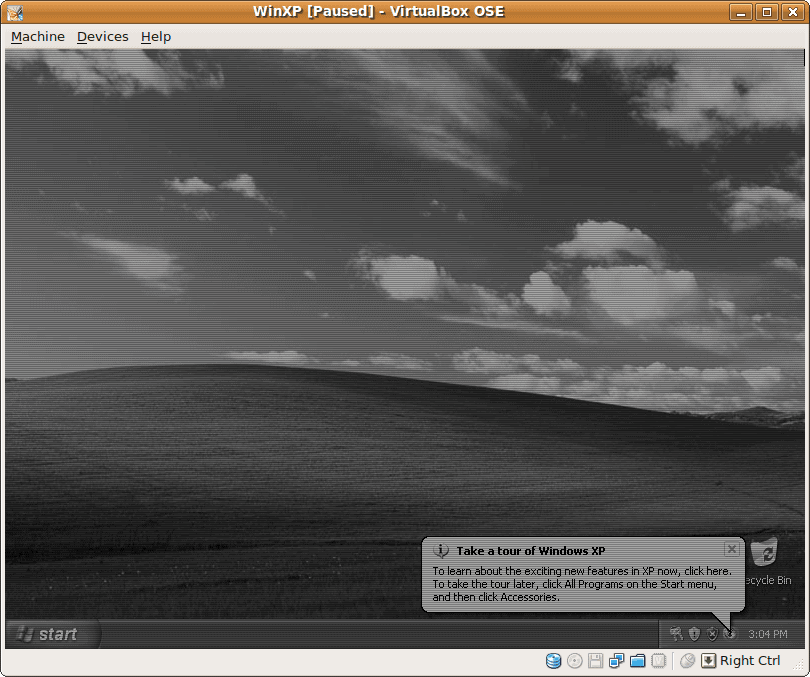
Instead of going through the standard process of shutting down Windows XP the easiest method of shutdown is to first Pause the virtual machine and then Close the virtual machine. When you pause the VM the screen will turn gray (see Figure 4) and you can then close that machine.
When you click Close you will see another window asking if you want to just close the machine or if you want to save the machine state before you close it. If you haven't saved the machine recently go ahead and select save machine state.
Now when you start that Virtual Machine back up it will start up in the same state it was when you closed it. Imagine starting up Windows XP in less than 5 seconds! That is what you will experience when starting a virtual machine from a saved state.
When all of your machines are closed you can then exit VirtualBox from the File menu of the main window.
Final thoughts
I hope your experience with VirtualBox is as good as mine. I have used a number of virtual machine software - from costly proprietary to free open source and I have to say that VirtualBox is one of the best.
Advertisement


Hi
I am using win10 Ent x64.
I tried to install win xp x86 on it in vm but system restart every time and win xp not installing.
any suggestion
Thanks in advance
thanks!!
For reasons I will not get into I want to delete win 7 and have only Linux. I presently have XP installed on VB windows recognizing my wireless network. From Linux Mint 14 with virtualbox installed I attempted the XP with no problem except in spite of my best efforts no recognition of wireless network. I am using legal XP Pro disk.
Any suggestions please advise and thanks
Hi, I have Windows 7 home 64 bit, using Virtualbox I tried to install win xp professional from cd also from the virtual drive created from iso image, it won’t work. Message is “Disk I/O error Press a key to restart”. From CD it says it didn’t find a bootable disk.
Please help
when i try to install xp in virtualbox on my windows 7 i get this message…”Setup cannot find a previous version of Windows installed on your computer.” suggestions?
I cannot get the SP3 update to install after installing XP as guest on Ubuntu 10.10 host in Virtualbox 4.0. I am a serious newbie wanting to learn.
moo
I have VirtualBox under 64 bit Ubuntu 10.4 (my first Linux) and just installed XP SP3 with my OEM (Dell) disk. Unsurprisingly, it wouldn’t accept the PRODUCT KEY.
My old Windows was trashed, so creating the image from there wasn’t an option.
Any thoughts?
Also, Right-Ctrl worked ONCE, but seems not to work almost (except for the ONE time it DID) every time I press it. I’ve been getting out ONLY by shutting down Windows!
And, what is that comment about “guest additions”??
nice tutorial .
But as I havent done this before I would like to ask a question .
Do we need to create a windows xp virtual image or diectly it can be done with the normal windws xp setup disk ??
@MG
It is rather hard to just explain. :) Had you tried VirtualBox help file? It has reasonably detailed instruction for shared folders so it would be easier if you told what step exactly fails for you.
I am not able to get the shared folders to work and I tried to follow what they say but I guess I am mot that good with a computer. Do you have a simplified way of doing this? in plain English.
Thank you
@sunshinekhan
Network connection in VirtualBox can be quite complex, no easy advice here. I can say it’s greatly improved in recent versions so if you are using older one then upgrade and try again.
Works for me with Windows host and Windows or Ubuntu guests and ethernet router.
Could never get to the internet in a VirtualBox-MicroXP. Although I see the connection in the tray…the virtual connection in XP SP3…tried a few times and gave up atleast for the moment ;) !
I use an ADSL router to connect…any ideas…something in the VirtualBox settings?
Rarst: That’s my next article. ;-)
Can you install Mac Os with this thing?
You forgot that VirtualBox guest additions must also be installed. Without them some things in virtualized Windows and part of VirtualBox functions (like seamless mouse) won’t work.