Create Video Card Profiles To Save Power And Reduce Noise

The following article is a guide that explains how you can create profiles for the installed video card to optimize it for different applications, namely working on the desktop and gaming.
The problem with running a video card in Windows is that the video card will always use the same clock and fan speed no matter if it is running in 2D desktop mode or 3D gaming mode.
As you can imagine, it does not make much sense to run the card at full speed if you are working on the desktop. A side effect of this behavior is that the noise the card's fan is making is more audible when you are working on the desktop.
In addition to that, the video card will waste power because it uses the same clock speed that it uses in 3D mode although that speed is usually not needed in 2D mode.
The guide will walk you through creating a 2D and 3D video card profile that will automatically switch the fan speed and the clock speeds of the video card depending on the application that is running on the computer. This generally means low clock and fan speeds in 2D mode and normal (or even faster) clock and fan speeds in 3D mode.
The program that can do all of that is called Rivatuner. It is compatible with both ATI and NVIDIA video cards. The advantage of using Rivatuner is that the software can do everything that we need and works both in 32-bit and 64-bit editions of the Windows operating system.
Please note that the clock and fan speeds are valid for the Geforce 8800 GTS video card that was used in the test and that the values for other video cards may differ. There is however a general pattern to it which will be explained.
1. We are going to create the following two profiles:
2D Mode: Low Fan Speed, Low Core Clock, Low Memory Clock
3D Mode: Fan Speed that cools the video card sufficiently, Default Core Clock and Memory Clock speeds. Advanced users may overclock if supported by the card.
2. Configuring Settings:
Before we can start to apply the profiles we need to make sure that we can set the clock speeds and fan speeds to lower values in 2D modes. This is done by clicking on the Power User tab and locating the following entries:
RivaTuner \Overclocking \Global
- MaxClockLimit: 200
- MinClockLimit: 15
RivaTuner \Fan
- MinFanSpeedlimit: 10
The first two values in Overclocking \Global enable a wider range of clock speeds that can be configured in Rivatuner while the second sets the minimum fan speed of the video card fan to 10%. The default without that setting would be 25%. Restart Rivatuner afterwards so that the changes can take effect.
3. Configuring core and memory clock profiles for 2D and 3D modes
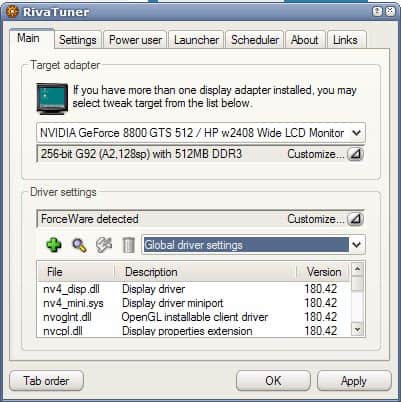
Open the System Settings menu of Rivatuner by clicking on the icon next to customize next to Driver Settings in the lower half of the main window and selecting the leftmost icon in the appearing icon pane.
The System Tweaks window will show up displaying Core, Shader and Memory clock speeds. The first profile will be the 2D mode. Remember that we need low settings for core and memory clock in that mode which will save power, reduce video card temperature and allows to reduce the fan speed because of this. The effect is a power saving, low temperature and low noise profile.
The value depends on a few factors and it is probably a good idea to start with relatively high clock speeds and reduce them further if no problems are experienced. A minimum core and memory clock of between 200 to 250 should be the goal for the 2D profile.
After setting the clock speeds check the Apply Overclocking At Windows Startup box. Hit Apply at the bottom and save the profile under Overclocking Profile Settings. (2D Profile)
Now do the same for the 3D clock speeds. A click on Defaults will load the default speeds for the video card. Make sure the Startup Settings box is unchecked. Click Apply again and save the profile. (3D Profile)
4. Configuring the fan speeds for the two profiles
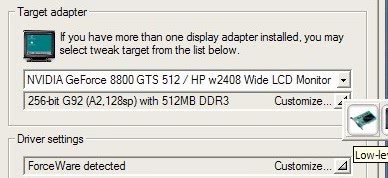
After creating the two clock speed profiles for 2D and 3D mode we have to create a fan profile for each mode. The fan setting can be loaded by clicking on the icon next to Customize under the Target Adapter area of the main interface and selecting the first icon of the icon row called Low-Level System Settings.
We start by defining the fan speed for the 2D profile. A click on Enable low-level fan control will provide access to the fan speed settings. Select Fixed from the check boxes and move the slider to the left. Clicking Apply will change the fan speed to the selected value. It's a matter of listening to the fan and selecting a fan speed level that is barely, if at all, audible. A value between 10-20% should be perfect for most video cards and ears. You should not set it to low unless you keep an eye on the temperature levels of the video card.
Check the Apply Fan Settings At Windows Startup box, hit apply and save the profile. (2D Fan).
Now do the same for the 3D profile. A click on Defaults will load the fan speed defaults again. Select a Fixed fan speed value that you are comfortable with, apply the changes and save the profile. (3D Fan)
5. Monitoring System Settings That Reveal 2D or 3D mode
We have created two clock speed and fan speed profiles and set the low clock and low fan speed profiles to load at Windows startup. If you keep the settings this way the 2D settings will be loaded in 3D mode because Rivatuner does not know when to change the profiles. You would have to change them manually whenever switching from 2D to 3D or vice verse.
What we do know is to configure hardware monitoring which will give the profile launcher the information needed to change profiles automatically.
Hardware monitoring is another icon in the Target Adapter icon row that appears when clicking on the icon next to Customize. The Hardware Monitoring display will open. A click on Setup in the lower right corner opens the settings which allow us to define additional values that should be monitored.
There are a few options to distinguish between 2D and 3D mode. One is to monitor Hardware Acceleration which is unfortunately also triggered in some 2D applications. A hardware acceleration of 0 means that it is off and would trigger 2D mode while a hardware acceleration of 1 would mean it is turned on and would trigger 3D mode. Another option is to monitor the Framerate instead which is always 0 in 2D mode.
You can enable one or both settings in the Data Sources menu in the lower half of the menu. A click on the checkmark in front of the name of the source will activate the monitoring of the source. A click on OK will close the setup window. Now find the Hardware Acceleration graph in the Hardware Monitoring window.
An icon is displayed next to the Hardware Acceleration name. A click on it will check the hardware acceleration continuously. A new icon will appear in the system tray. Right-click that icon, select Setup and check the Run At Windows Startup entry. Now that we have done that it is time to configure the profile switcher.
6. Configuring the Profile Switcher
Before we can schedule the profile changes we have to create two launcher items. Selecting Laucher from the main tab and clicking on the green + icon will initiate that. Select Regular item from the next menu.
Enter a name (2D / 3D) and check the Associated overlocking profile and Associated fan profile boxes. Select the corresponding profiles created earlier. You should have a 2D and a 3D launcher item afterwards in the main Launcher window.
Now it is finally time to configure the Scheduler. A click on the Scheduler will load a window that resembles the Launcher tab. A click on the green + will open the menu were we can configure when to change from the 2D profile to the 3D profile.
Give the task a name, select the 3D profile from the list of profiles under Name and select Run Task on hardware monitoring range event under Schedule. Pick Hardware Acceleration as the Data Source and select a range from 1 to 1. A click on OK will save the new scheduled event.
Now create another scheduled event for automatically switching from the 3D profile to the 2D profile. All settings remain the same except for the profile which obviously has to be the 2D profile and the range for the hardware acceleration setting which has to be 0 in both cases.
Conclusion:
We have created two profiles which switch automatically from 2D to 3D and 3D to 2D profiles. The 2D profile will make use of a low noise fan, low power consumption and lower temperatures while the 3D mode will use the default video card settings to ensure that all 3D applications function properly with decent framerates.
If you have any questions about the procedure feel free to ask. Please note that Rivatuner will automatically start with Windows when setting this up this way.


Thanks Martin for the helpful tutorial….
Black Rat this is for you….
I am using XFX 4870
Using RivaTuner 2.24 i was able to change my profiles using the GPU usage parameter.
Normally from what i observed (and experimented) using windows 7 64 bit with aero enabled and using regular apps my GPU usage was between 0-10 % and when playing games it was always above 90%.
So to be on the safe side i set Switching to low profile when GPU usage is between 0-20%
AND
High profile when GPU usage is between 20-100%
AND it worked like charm
Thanx to Martin once again for showing me the light
I’ve been using something similar, only the trigger in my setup was temp rather than framerate.
Keeps the card quiet when in the desktop and ramps it up as the card heats up during gaming.
Thank you, it really works!
Are there problems when playing a movie in 2D mode ?
This guide helped me much but caused also two prolblems:
1. In the screenshot you see “Hardware acceleration / OGL”, which only works for OpenGL apllication/games. The correct would be simple “Hardware accelaration” which is for all DirctX and OpenGL.
2. In the comments the author recommends to use framerate monitoring instead. This works for switching to 3D prifile, but not back to 2D, so this tip is worthless. The reaseon for this is, that if no 3D application/game detected the framerate is not 0, it has no value instead. So the trigger, checking if frame rate is 0 won’t work!
no go on Vista 64 yet….
Brian I have not tried it in Windows Vista. What you might need to do if Aero is using hardware acceleration is to switch from that to the framerate monitoring instead and set 2D mode whenever the framerate is 0 to 0 and 3D if the framerate is higher than 0.
How does this cope with the fact that Aero is considered “3D” in Vista? Will this run at full speed all the time in Vista because of that?