Upgrade a Windows XP Recovery CD to a full installation one

When you buy a pre-build computer system it usually ships with an operating system that is already installed on it. These systems may not ship with a full copy of the operating system. They may ship with a recovery CD that you can use to restore the operating system when it does not boot anymore, or with options to create such a disc when it does not ship with one.
Either way, this makes it impossible to install the operating system on a new system that you may buy or have. The only option that you have in this case is to buy an extra copy of Windows and use it to install it on the new system.
What many users do not know is that they have options to turn a recovery CD into a bootable standalone CD that they can use to install the Windows XP operating system.
You only need one tool and the recovery CD of course. Download the tool XP Iso Builder and install it on your system. Create a temp directory for the new CD on your hard drive, name it XP for instance. Copy the complete recovery CD to the temporary folder. Make sure you copy hidden and system files as well (check in folder options that they are shown when you browse directories).
You may want to delete the folder $OEM$ in the temporary directory, it contains software that the manufacturers added to the recovery CD. This software is normally not needed.
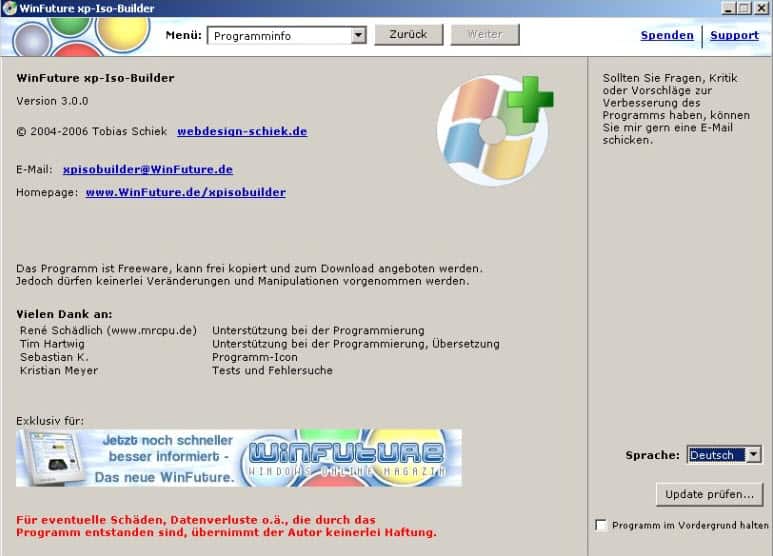
Start XP Iso Builder and make sure the language is set correctly.
- Click on the button convert recovery disk to get started.
- Select your operating system under (1).
- Browse to the temp dir in (2).
- Click on Search through hard drive automatically in (3).
- The i386 folder should be at least 420 megabytes in size, if more than one is found select the one with that size. The folder has to be on your hard drive and not in the temp XP folder that we created before.
- Select start to begin the process and close when it is finished.
- Click on Start Choose Folder / Drive in the main window and select the temporary folder that we created.
- Select No afterwards.
Integrate Service Pack 3
If the recovery CD does not contain Service Pack 3 you can integrate it to automatically so that you do not have to install it manually afterwards. Download Windows XP service pack 3 Network Installation Package for IT Professionals and Developers. Save the file to your hard drive and select Integrate Service Pack in XP Iso Builder. Browse to the file and select it, the integration of the service pack should begin.
Download and integrate Updates
After we have integrated the service pack we can integrate new updates as well that have been released for the operating system. The easiest way is to use an update pack that contains all updates since the release of service pack 3. One location to download that file would be the winboard website. Unpack the downloaded file on your hard drive and select the entry (8) Service Updates from the xp iso builder menu.
Browse to the folder that you unpacked the files to and hit ok once you are done. All updates will be added to your installation which may take a couple of minutes.
Create the actual ISO image
Select (11) Finish from the menu and click on start integration. Select a filename and the creation starts.
After this is done you are ready to burn the iso to a cd with a tool like Nero for instance.
That is it. You created a full windows xp installation cd from your recovery cd and may now install it on different computers.


Hello, Martin.
Seems this is what I am just looking for. I got question: my xp system crashed, and I already cleaned the whole hard drive including the hidden partition. I tried using the recover CD to install, but, failed to boot the system. Until see your comments here, I just knew why. Problem is that my XP has already crashed. Can I use another computer with either XP or other operating system to create the installation CD?
Thanks a lot!
Jim yes I think that is possible.
Thanks a lot, Martin.
I tried using another XP, however, can’t find the i386 dir with more than 400M, the one in this harddrive is only 99M. Is that normal?
Jim
If I remember correctly you have to copy the CD to the PC and use that i386 directory.
Thanks, Martin.
I checked all the files from CD, it doesn’t have the I386 dir. It has a huge folder named “recovery” which is ca. 2.40G. I am not sure if I should do other operation to get the I386.
Best,
Jim
Where can I get step by step instructions on how to add my programs like Office 2003 that I use? I also have Windows XP Professional CD that I want to use but do not have its Recovery CD as my system was shipped with Windows XP Home (I do not even know where to get my recover XP Home CD). My system is a Dell
i have 2 recovery dvd with identical file names but named as system recovery 1/2 and 2/2.
what should I do? i can not copy both dvds in the same directory.
copy the second one to a different directory temporarily, then rename it, then move it with the first one.
I have this same question (about having 2 recovery disks each having files of the same name), but I need a bit more direction.
When I copied the 2 recovery disks, I put each into a folder of its own under temporary directory “XP”. So under “XP” there is now “Disk 1″ and Disk 2” folders.
What is it that I need to rename? Do I need to combine “Disk 1” and “Disk 2” after renaming files? (If so, can you give me a suggestion about the new names to use?)
Sorry for the nuisance, but I can’t quite picture what you’ve suggested. Your help is appreciated.
Steve
say i do this with my recovery cd, but on a friend’s pc. once i install to my pc, will i need the SERIAL or KEY or something? the problem is that i don’t have any numbers, and my current pc is fried.
or do i just call MS and speak to them? are the steps described in this tutorial legitimate as far as MS is concerned, in my particular scenario? and if i do need to contact them, will they even speak to me regarding XP or is support for it over with?
I have used it for Windiws XP. its really amazing. I wonder can I use same software/steps for Windows Vista?
Waiting for reply……
Best,
Naeem
You need to rename the file to UPPERCASE (USBEHCI.SYS or USBEHCI.SY_, and other drivers needed by txtsetup of xp, they are enumerated below while loading the drivers, ex. NT File System Driver (ntfs.sys) just rename them all to uppercase, most are already capitalized) then it should work!
your question is not very clear. if you just want to reinstall the windows media center, why don’t you just download the program and install it?
I am talking about reinsallying windows xp the entire system, this method worked for me.
will this work for windows xp media center edition 2005
wow, thanks! i have this installation cd, but it is not bootable. i tried so many different ways, and i even tried linux, hoping that it will let me run this cd, but it didn’t work.
i finally found your page, i was able to convert that cd to a bootable Cd, so i was able to reinstall the entire windows system, excellent!
thanks! ps: that iso builder doesn’t work with windows vista when i tried it.
Hi
I tried this and it seemed to be working until it came up with an error when installing XP, “the file usbehci.sys is corrupted” anyone know why this happened? I followed the instructions correctly.
hey i have a question when i hit start, it says do you want to replace the i386 folder. am i supposed to?? will that mess up operation of windows??
How big is your i386 folder on your hardrive ? I think you must be doing something wrong but I have troubles finding out what..
You select the right i386 folder on your hard drive ? not the one that is in the folder xp, right ?
How big is the recovery folder when you copy it from cd to your hard drive ? I see that you mentioned reinstallation cd not recovery cd, do you think that it is the same ?
Did you try burning it on a dvd instead ? Did you analyze the folders and check which ones are the biggest ?
Andrew, sure you can do that manually by clicking on the … next to the white line in (3). Browse to the i386 dir and select it.
You have to copy the recovery cd to disk because this is where the new iso will be created from. All other files, like updates, will be integrated there.
Thanks very much for this tutorial. I ran into a problem when I tried this, however. When I clicked “Search through hard drive automatically,” the search stopped after a second and I got an “Error: 9999: script error” message, then the program closed. Can I point the program to the I386 folder in C\WINDOWS manually instead? I was also wondering why you have to copy the recovery CD into a temp folder? Any advice would be greatly appreciated
May have to do this to a DVD and also add my most used programs as well.
Pictures,other things I use on a daily basis.
Oh, I’d like to add that you can customize the installation beyond what I have written here. You may integrate the xp key and all the settings that show up when you install the operating system. (you can even add user accounts, drivers and applications)
Means less work for you.
Luke I did try it with a XP pro CD that I had. Think it was from Dell but not sure right now. It should work with most, if not all, OEM CDs.
Thanks for the tip! Will this work with any OEM version? Which OEM CD’s have you tried it with?
Sweet!. Been looking for this for along long time!.